
This page is dedicated to my Danish JK cabinet. I'll try to collect information about it as well as post updates I've done on it.

Looks great, plays great. As you can see, the ugly Suzo shaft is replaced with a pretty steel one with a white ball from Seimitsu. This was possible due to this custom shaft that were created by a polish joystick enthusiast:

It's the same shaft, but the bottom picture also has a steel pivot. I used the original plastic one, as it worked better for me.
Here's a height comparison picture of the original Suzo and the custom one:

As you might notice, the dust washer in the right picture isn't resting on the panel, so I had to create another mounting solution. But it's all good now as you can see in the top picture (with the white ball).
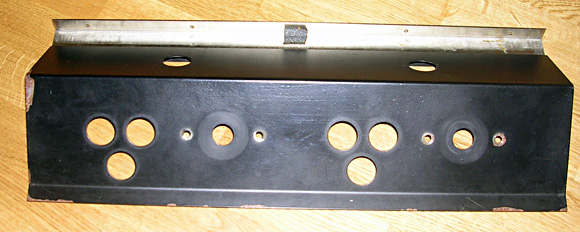
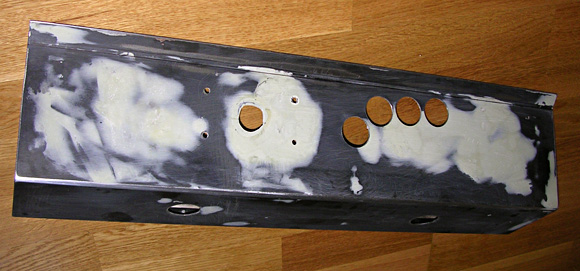
Started by stripping the rusty panel

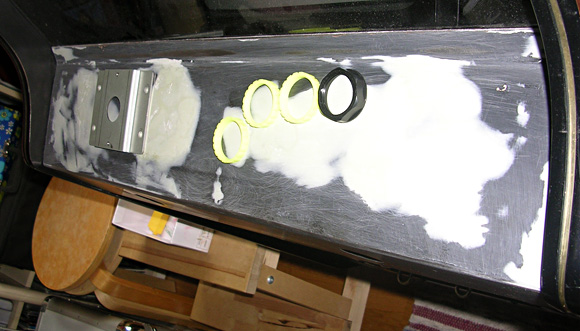
I then put some packing tape to have something to keep the Plastic Padding Epoxy puddy I was going to use for filling the standard holes.

Added some cardboard as well as I've never worked with Epoxy in this situation before. Don't want to glue this panel to my table.

Then I sanded the panel with 180 grade paper

After filling the holes with Epoxy, I sanded using 180 grain again, then laid out my button and joystick bits to have a look at my control layout
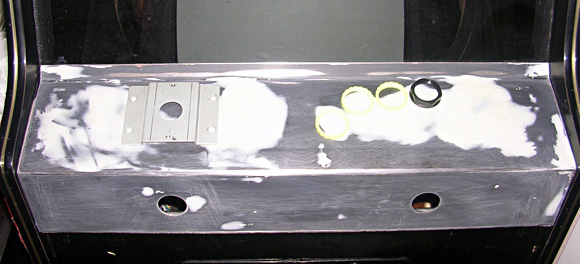
As you can see in the above picture, I used the original start button placement and put the new joystick center aligned with that. Luckily for me, the rather long HAPP button plunger just about cleared my joystick base.
Holes are drilled. As the Epoxy is softer than the metal, the drill wanted to stay in that rather than the metal, so the joystick hole was a little bitch to finish. More Epoxy to mask that up and it's all good though.
On with the generic HAPP CPO I'd already bought from a fellow collector a coulple of months back and some buttons

I can clearly see now that the sanding could have gotten some extra attention 'round the joystick hole. I'm in luck that I'm one of those people who actually prefer to have the dust covers on top of the hole.

The ugly, yet incredible Suzo Inductive stick is mounted.

I will post another update as soon as I've installed the custom Suzo handle I've ordered from Kowal in Poland.
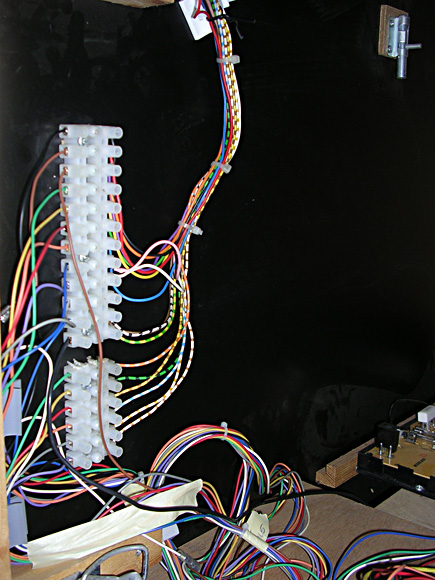
Yesterday I finally installed a new JAMMA harness. The term "long overdue"
comes to mind. Also hooked up an auxillary panel for JAMMA TEST- and
SERVICEbuttons. Really handy. Screwed everything into the wood so now it's
really in place. Clean and easy to get to.

Quick connects for the player controls:
The "guts" of the cabinet:
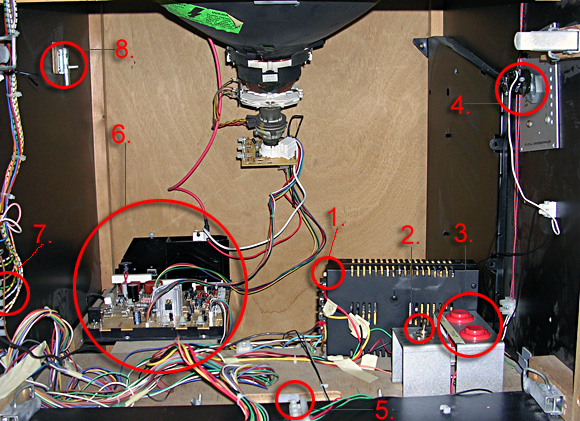
1. Adjust 5+ volts | 2. Coin button on the outside (on/off) | 3. SERVICE & TEST buttons | 4. Coin button
5. Quick connect for coin mechanism | 6. Video chassis | 7.Player controls quick connects
8. PCB holder (put your game PCB on a piece of wood and gently slide that piece under this)
I don't use #8 above because I have this handy TV-dinner tray instead:

This tray is great, cause you can reach the chassis board to adjust video while your game PCB rests
comfortably ontop of the TV-dinner tray. It holds my huge Sky Shark bootleg PCB without any problem.
Also snapped a photo of my chassis. The H-Width coil is unfortunately not working.

2007-06-14
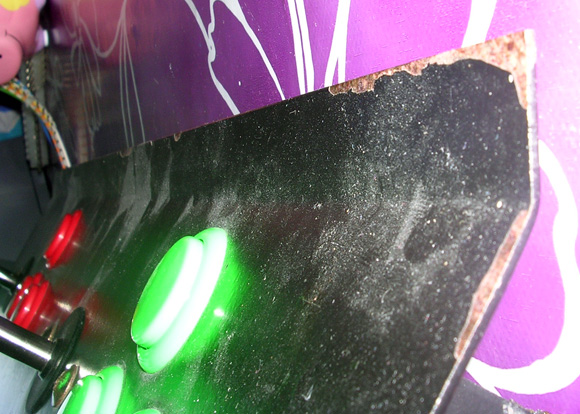
Added some new Seimitsu buttons to my control panel.
I have bought an extra button for each player that I'm gonna hook up when I've
gotten some holes drilled for them. For NEO-GEO games or whatever uses
more than three buttons.
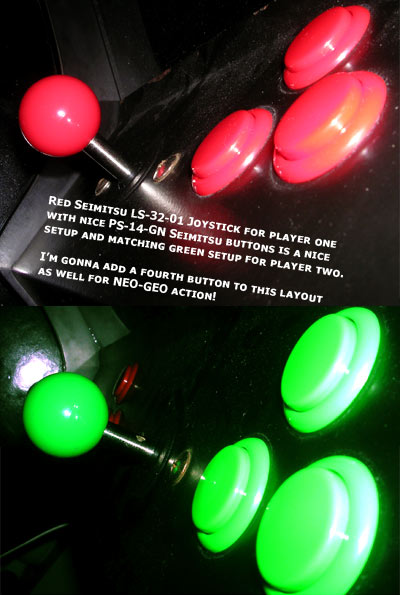
Also hooked up a very convinient credit button today:
